Embroidered sweatshirts make an excellent present for the holiday season! Curved neckline embroidery has been popular for a while, however I have seen a surge in embroidered sleeves to go with it. I love this trend and there are so many fun personalized projects that we can make with this. Now this project would be easiest on a free arm machine like my PRX1, or multi-needle like my PR680W or Ricoma EM101. But I want to show you its possible on a flatbed machine too so I will be using my PE800 in this tutorial. I will be going over 2 different hooping methods for the sleeve and how to curve text in Embrilliance Essentials to create the neckline.
VIDEO TUTORIAL
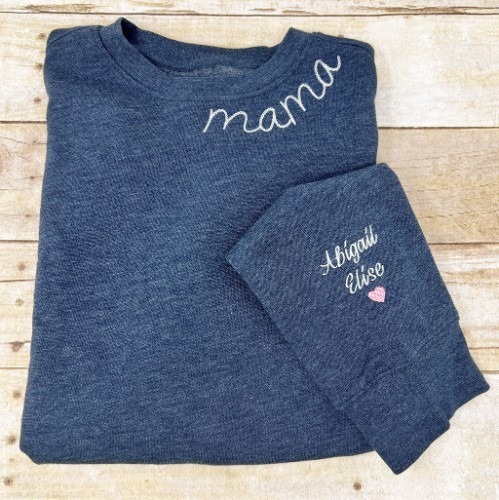
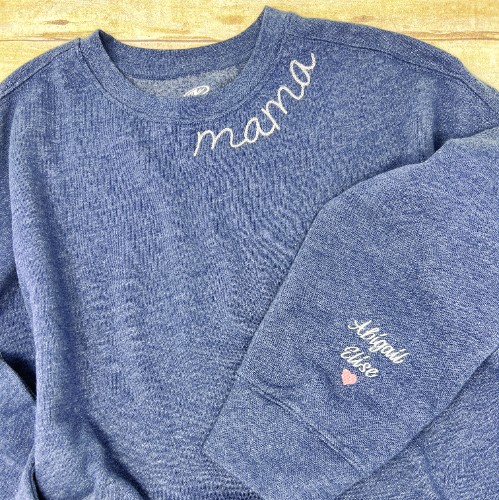
I will be making my mom a grandma sweater and will put her grandkids names on the sleeve. I love the look of a little heart under the names. So I made one for you to download for FREE. Just click the button below to grab it.
In this tutorial, we’ll learn how to embroider a personalized sweatshirt or sweater perfect for holiday gifts. We’ll cover two methods for embroidering the sleeve, as well as how to curve text for the neckline embroidery using Embrilliance Essentials.
Introduction and Project Overview
Welcome to my craft room! I’m excited to share this tutorial with you, where we’ll be creating personalized sweatshirts or sweaters that make perfect holiday gifts for your friends and family. In this project, I’ll be making a special sweater for my mom, featuring a personalized neckline and embroidered names on the sleeves. Join me as we explore different methods for customizing and personalizing your own unique designs.
Supplies Needed:
- Sweatshirt
- Any embroidery font
- I used The Fighter Skinny Chain Native Font from Lynnie Pinnie for the neckline
- I used Evening Stroll from Designs by JuJu for the sleeve
- I also love the new font Winter Chai from Applique Alley for the sleeve and neckline
- Free Heart Embroidery Design
- Embrilliance Essentials
- Cut Away Stabilizer Use coupon code “karliebelle” to save 10%
- Spray n Bond Use coupon code “karliebelle” to save 10%
- Pins
- Seam Ripper
- Water Soluble Topper Use coupon code “karliebelle” to save 10%
- Clover Stiletto Use coupon code “karliebelle” to save 10%
- Applique Scissors Use coupon code “karliebelle” to save 10%
- Organ 75/11 BP Needles Use coupon code “karliebelle” to save 10%
- Precision Tweezers Use coupon code “karliebelle” to save 10%
- Embroidery Thread Use coupon code “karliebelle” to save 10%
- Pre-wound Bobbin
Sleeve Embroidery Methods
Embroidering sleeves can be done using various methods, depending on the design and size of the embroidery. Here, we’ll explore two different hooping methods for embroidering sleeves to achieve professional and personalized results.
Curved Neckline Embroidery in Embrilliance Essentials
Creating a curved neckline embroidery design can add a personalized touch to your sweatshirt or sweater. With Embrilliance Essentials, you can easily achieve this effect for a professional-looking finish.
Choosing the Font
When selecting a font for the curved neckline embroidery, consider using a script font like “Winter Chai” from Applique Alley. The lowercase letters in this font create a charming and elegant look when curved along the neckline.
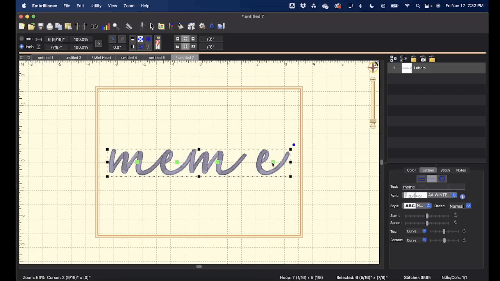
Curving the Text
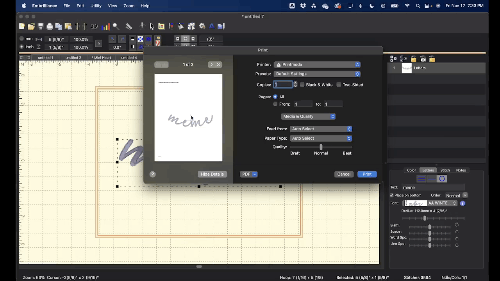
To curve the text, start by typing out the desired words in the chosen font. Then, use the circle feature in Embrilliance Essentials to curve the text along the neckline. You can adjust the curvature to fit the specific shape of the neckline.

Placement and Adjustment
After curving the text, it’s essential to print it out to ensure proper placement. Cut out the printed design and test it on the neckline to see how it aligns. Make any necessary adjustments, such as widening the curve, and print it out again for final placement.
Hooping and Stitching the Neckline
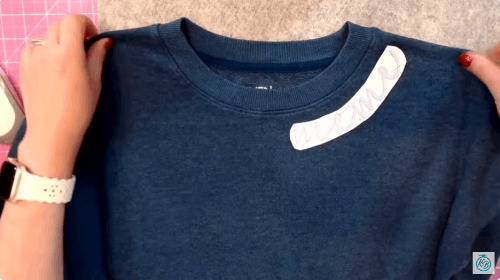
When preparing to embroider the neckline, it’s essential to ensure the sweatshirt is laid flat on the table, keeping it straight and aligned for accurate placement of the design. After selecting the appropriate hoop size, apply temporary spray adhesive to the stabilizer and float the sweatshirt onto the hoop. Consider using the crosshairs on the printout as a guide for positioning the design, and secure the sweatshirt with pins outside the embroidery area to prevent movement during stitching.
Machine Setup and Design Placement
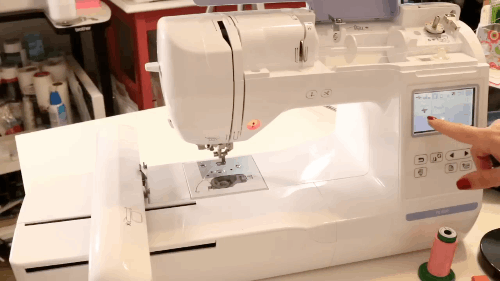
Once the sweatshirt is hooped and positioned, load the chosen design onto the machine. It’s crucial to verify that the direction and alignment of the design match the printout. Use the machine’s features, such as rotating the design and using the needle-down function, to ensure precise placement over the crosshairs on the sweatshirt. Additionally, consider using a water-soluble topping to prevent thread sinking into the fabric during stitching.
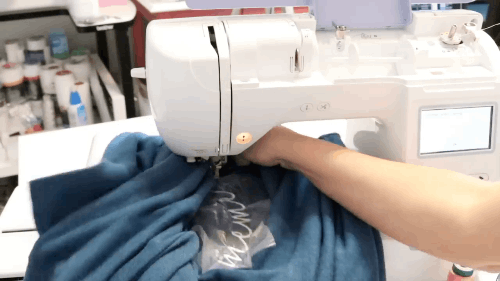
Stitching the Neckline Design
Before initiating the embroidery process, adjust the machine’s settings for speed, considering the bulkiness of the sweatshirt. Starting with a slower speed can help prevent unexpected fabric movement. Once everything is set, lower the presser foot and begin stitching the design. Throughout the stitching process, monitor the machine to ensure no material obstructs the needle’s path, and use tools like a stiletto to manage any potential obstructions.
Hooping and Stitching the Sleeve
In this section, we’ll explore the process of hooping and stitching the sleeve for embroidery. There are two methods to consider when hooping the sleeve, each with its own set of steps and considerations. Let’s dive into the details of hooping and stitching the sleeve for a professional and personalized finish.
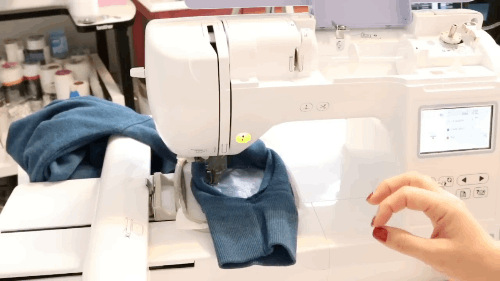
Method 1: Floating the Sleeve
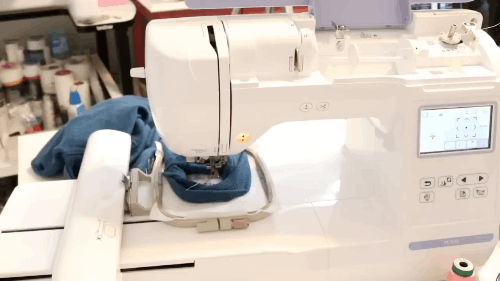
When floating the sleeve, the process involves stretching the opening of the sleeve to create a flat surface for hooping. This method is suitable for situations where a sewing machine isn’t available to open and resew the seam closed. However, it requires careful pinning and attention to detail to ensure the embroidery design is accurately positioned and stitched.
- Stretch the Sleeve Open: Carefully turn the sleeve inside out and open the sleeve hole to create an opening for hooping.
- Positioning the Design: Use the crosshairs on the printed design to guide the placement of the embroidery on the hooped stabilizer.
- Pinning and Securing: Pin the sweatshirt to the hoop to secure it in place, ensuring the opening is stretched and pinned to allow for smooth stitching.
- Embroidery Process: Stitch the design, closely monitoring the machine and using a stiletto to keep the fabric and stabilizer in place throughout the stitching process.
Method 2: Opening the Seam
Opening the seam of the sleeve provides a larger and more accessible area for hooping, making the process of hooping and stitching the sleeve more manageable and less tedious compared to the floating method. This approach allows for easier manipulation of the fabric and better control during the embroidery process.
- Opening the Sleeve Seam: Use a seam ripper or small scissors to carefully open the seam of the sleeve, creating a larger opening for hooping.
- Hooping the Sleeve: With the seam opened, position the sleeve on the hoop, ensuring the embroidery design is aligned and centered within the hooped area.
- Securing the Fabric: Pin the sweatshirt to the hoop, ensuring the fabric is smooth and taut to prevent shifting during embroidery.
- Embroidery Completion: Proceed with stitching the design, adjusting the machine settings for optimal speed and using tools like a stiletto to manage any fabric obstructions during the embroidery process.
By understanding these two hooping methods, you can choose the approach that best suits your resources and preferences when embroidering sleeves for personalized and professional results.
Finishing Touches and Additional Personalization Ideas
After completing the embroidery on your sweatshirt or sweater, there are some finishing touches and personalization ideas that can take your project to the next level. Whether you’re looking to add a unique touch or personalize the garment for a specific individual, these ideas can help you create a truly special piece.
Trimming and Cleanup
Once the sleeve and neckline embroidery is finished, it’s essential to carefully remove any excess stabilizer or water-soluble topper. Using small embroidery scissors, trim any jump stitches and carefully clean up the area around the design to ensure a neat and professional finish.
Personalizing with Names and Designs
If you’re creating a personalized piece for a loved one, consider adding their name or initials to the garment. Whether it’s on the neckline as a neckline embroidery, sleeve, or chest area, adding a personal touch can make the item truly special. Additionally, consider incorporating small designs or motifs that hold significance to the recipient, such as hearts, animals, or symbols that reflect their interests or hobbies.
Customizing for Pets
For those who want to create personalized pieces for pet lovers, consider incorporating designs or names of their beloved pets into the embroidery. This could include adding pet names, paw prints, or small animal motifs to create a unique and heartfelt garment that celebrates their furry friends.
Adding Applique and Special Fabrics
Another way to personalize the garment is by incorporating applique elements. Consider using special fabrics, such as pieces from a child’s baby clothing or fabric with sentimental value, to create applique letters or designs that hold personal significance. This adds a unique and sentimental touch to the garment.
Creating Matching Sets
If you’re looking to expand your project, consider creating matching sets of clothing. This could include a sweatshirt and sweatpants ensemble, where you can coordinate the embroidery designs across both pieces for a cohesive and stylish look. Creating matching sets can make for thoughtful and personalized gifts for loved ones.
Exploring Different Text and Font Styles
Experiment with different text and font styles to create varied looks for your embroidery projects. Whether it’s script fonts for a classic and elegant touch or bold lettering for a modern and eye-catching design, the choice of font can significantly impact the overall aesthetic of the garment.
Additional Embellishments and Embroidery Techniques
Don’t hesitate to explore additional embellishments and embroidery techniques to elevate your project. This could include adding sequins, beads, or metallic threads to enhance the design. Furthermore, consider incorporating advanced embroidery techniques such as 3D embroidery, thread painting, or intricate stitching patterns for a truly unique and artistic finish.
Sharing and Gift Ideas
Once your personalized garment is complete with hooping stitching, consider sharing your creation with others or gifting it to a loved one. Handcrafted, personalized garments make for thoughtful and cherished gifts that are sure to be appreciated. Whether it’s for a special occasion or a meaningful gesture, your personalized embroidery project can bring joy and delight to those who receive it.
💻 Check out past Sip & Stitch projects
🪡 Learn more about my beginner course on machine embroidering, From Start to Stitch
❤️ Join my Sip & Stitch Squad VIP Membership
🧵 Join my Facebook Group for discussion and help on machine embroidery and crafting
You can checkout all of my previous Sip & Stitch projects here. I look forward to chatting with you the next time I am live. You can get info on all of my upcoming projects on the Sip & Stitch Homepage. I am live on my YouTube channel every 3rd Friday of the month with a new tutorial 😁.
🌟🌟🌟 I now have a direct contact at Sewing Machines Plus if you have questions or are ready to purchase a new machine. Call Jean at 800-401-8151 Ext: 139 or email her at jean@sewingmachinesplus.com Tell her Karlie Belle sent you 😘.
Thanks for stoping by!